
Tower of London
Use this guide to pick the right gate, time the Crown Jewels, catch the Yeoman Warder tour, and dodge school-group bottlenecks.
Read this before you enter
Avoid the most common visitor mistakes.
Visitor essentials
Entry timing, transport, security, and facilities for the Tower of London.
Arrival timing
Arrive 15 minutes before your timed slot for ticket scan and security.
Public transport
Tower Hill Underground is the easiest stop; the entrance is a 5-minute walk.
Bags policy
Large suitcases are refused; use the Excess Baggage Company at London Bridge station.
Security checks
Expect airport-style bag checks at Middle Drawbridge; knives and pepper spray are seized.
Photography
Photography is banned inside the Jewel House; staff enforce it at the entrance.
Accessibility
Wheelchairs are welcome; uneven cobbles and stairs limit access in several towers.
Inside the Tower, step by step
Hit the Tower’s named showpieces in route order, with the best angles and quick context.
Middle Tower & Byward Tower Gate
Cross the outer moat line and pass under two medieval gatehouses with portcullis grooves and arrow slits. The walkway frames the White Tower straight ahead in under 3 minutes.
What to notice here
- Byward Tower portcullis grooves
Look up for the twin portcullis slots cut into the stone tunnel.
- Murder of the Princes plaque
Read the short inscription by the gate for the 1483 story hook.
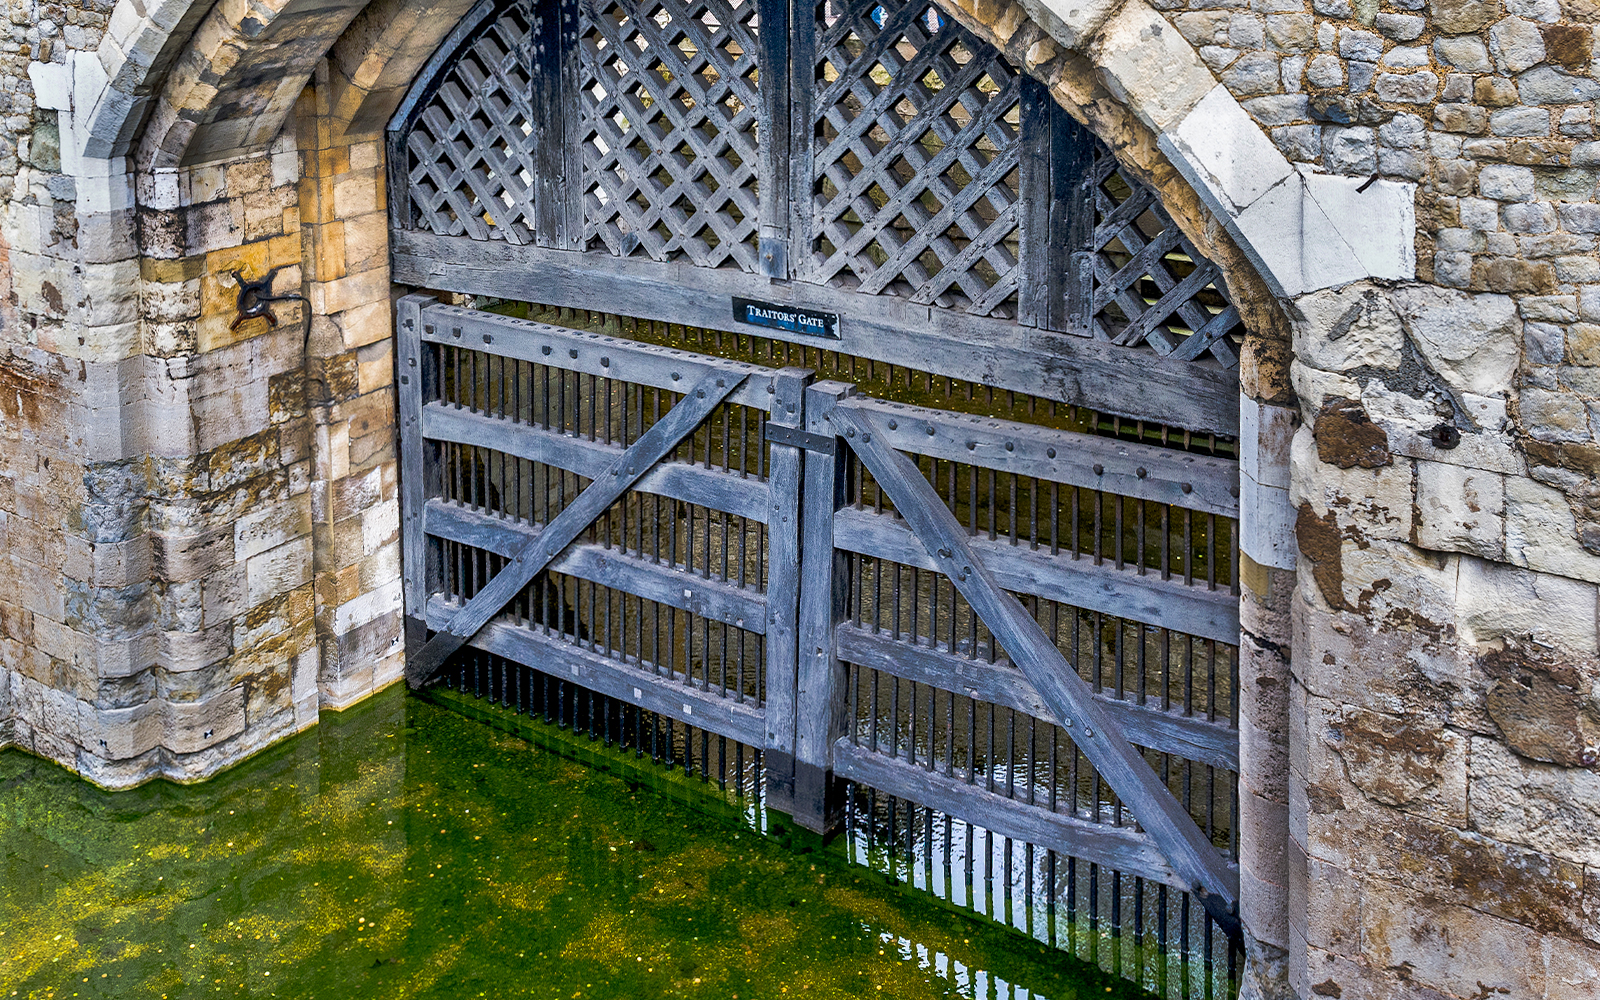
- Traitors’ Gate waterline
Spot the river-level entry that matches the old Thames approach.
⚡ Quick story
The Byward Tower complex formed the main landward choke point for Edward I’s late-1200s defences.
📍 Visitor tip
Pause just after the Byward arch for a centred White Tower photo with fewer heads before 10:30.
Explore Smarter
Insider shortcuts, better routes, and smart decisions that save time inside.
Hit the Crown Jewels first
Go straight to the Jewel House. By 11:00 the line often spills into the yard and adds 30+ minutes.
Find Traitors’ Gate waterside
Walk the river edge and stop at Traitors’ Gate below St Thomas’s Tower. Most people miss it while beelining inside.
Do the walls counter-clockwise
Start near the Middle Tower and loop counter-clockwise to the White Tower. You dodge the heaviest jams on narrow wallwalks.
Skip the Raven shop stop
The Raven Shop sits by the exit and repeats souvenirs from the main shop. Save it for the last 5 minutes.
Use the Wakefield Tower view
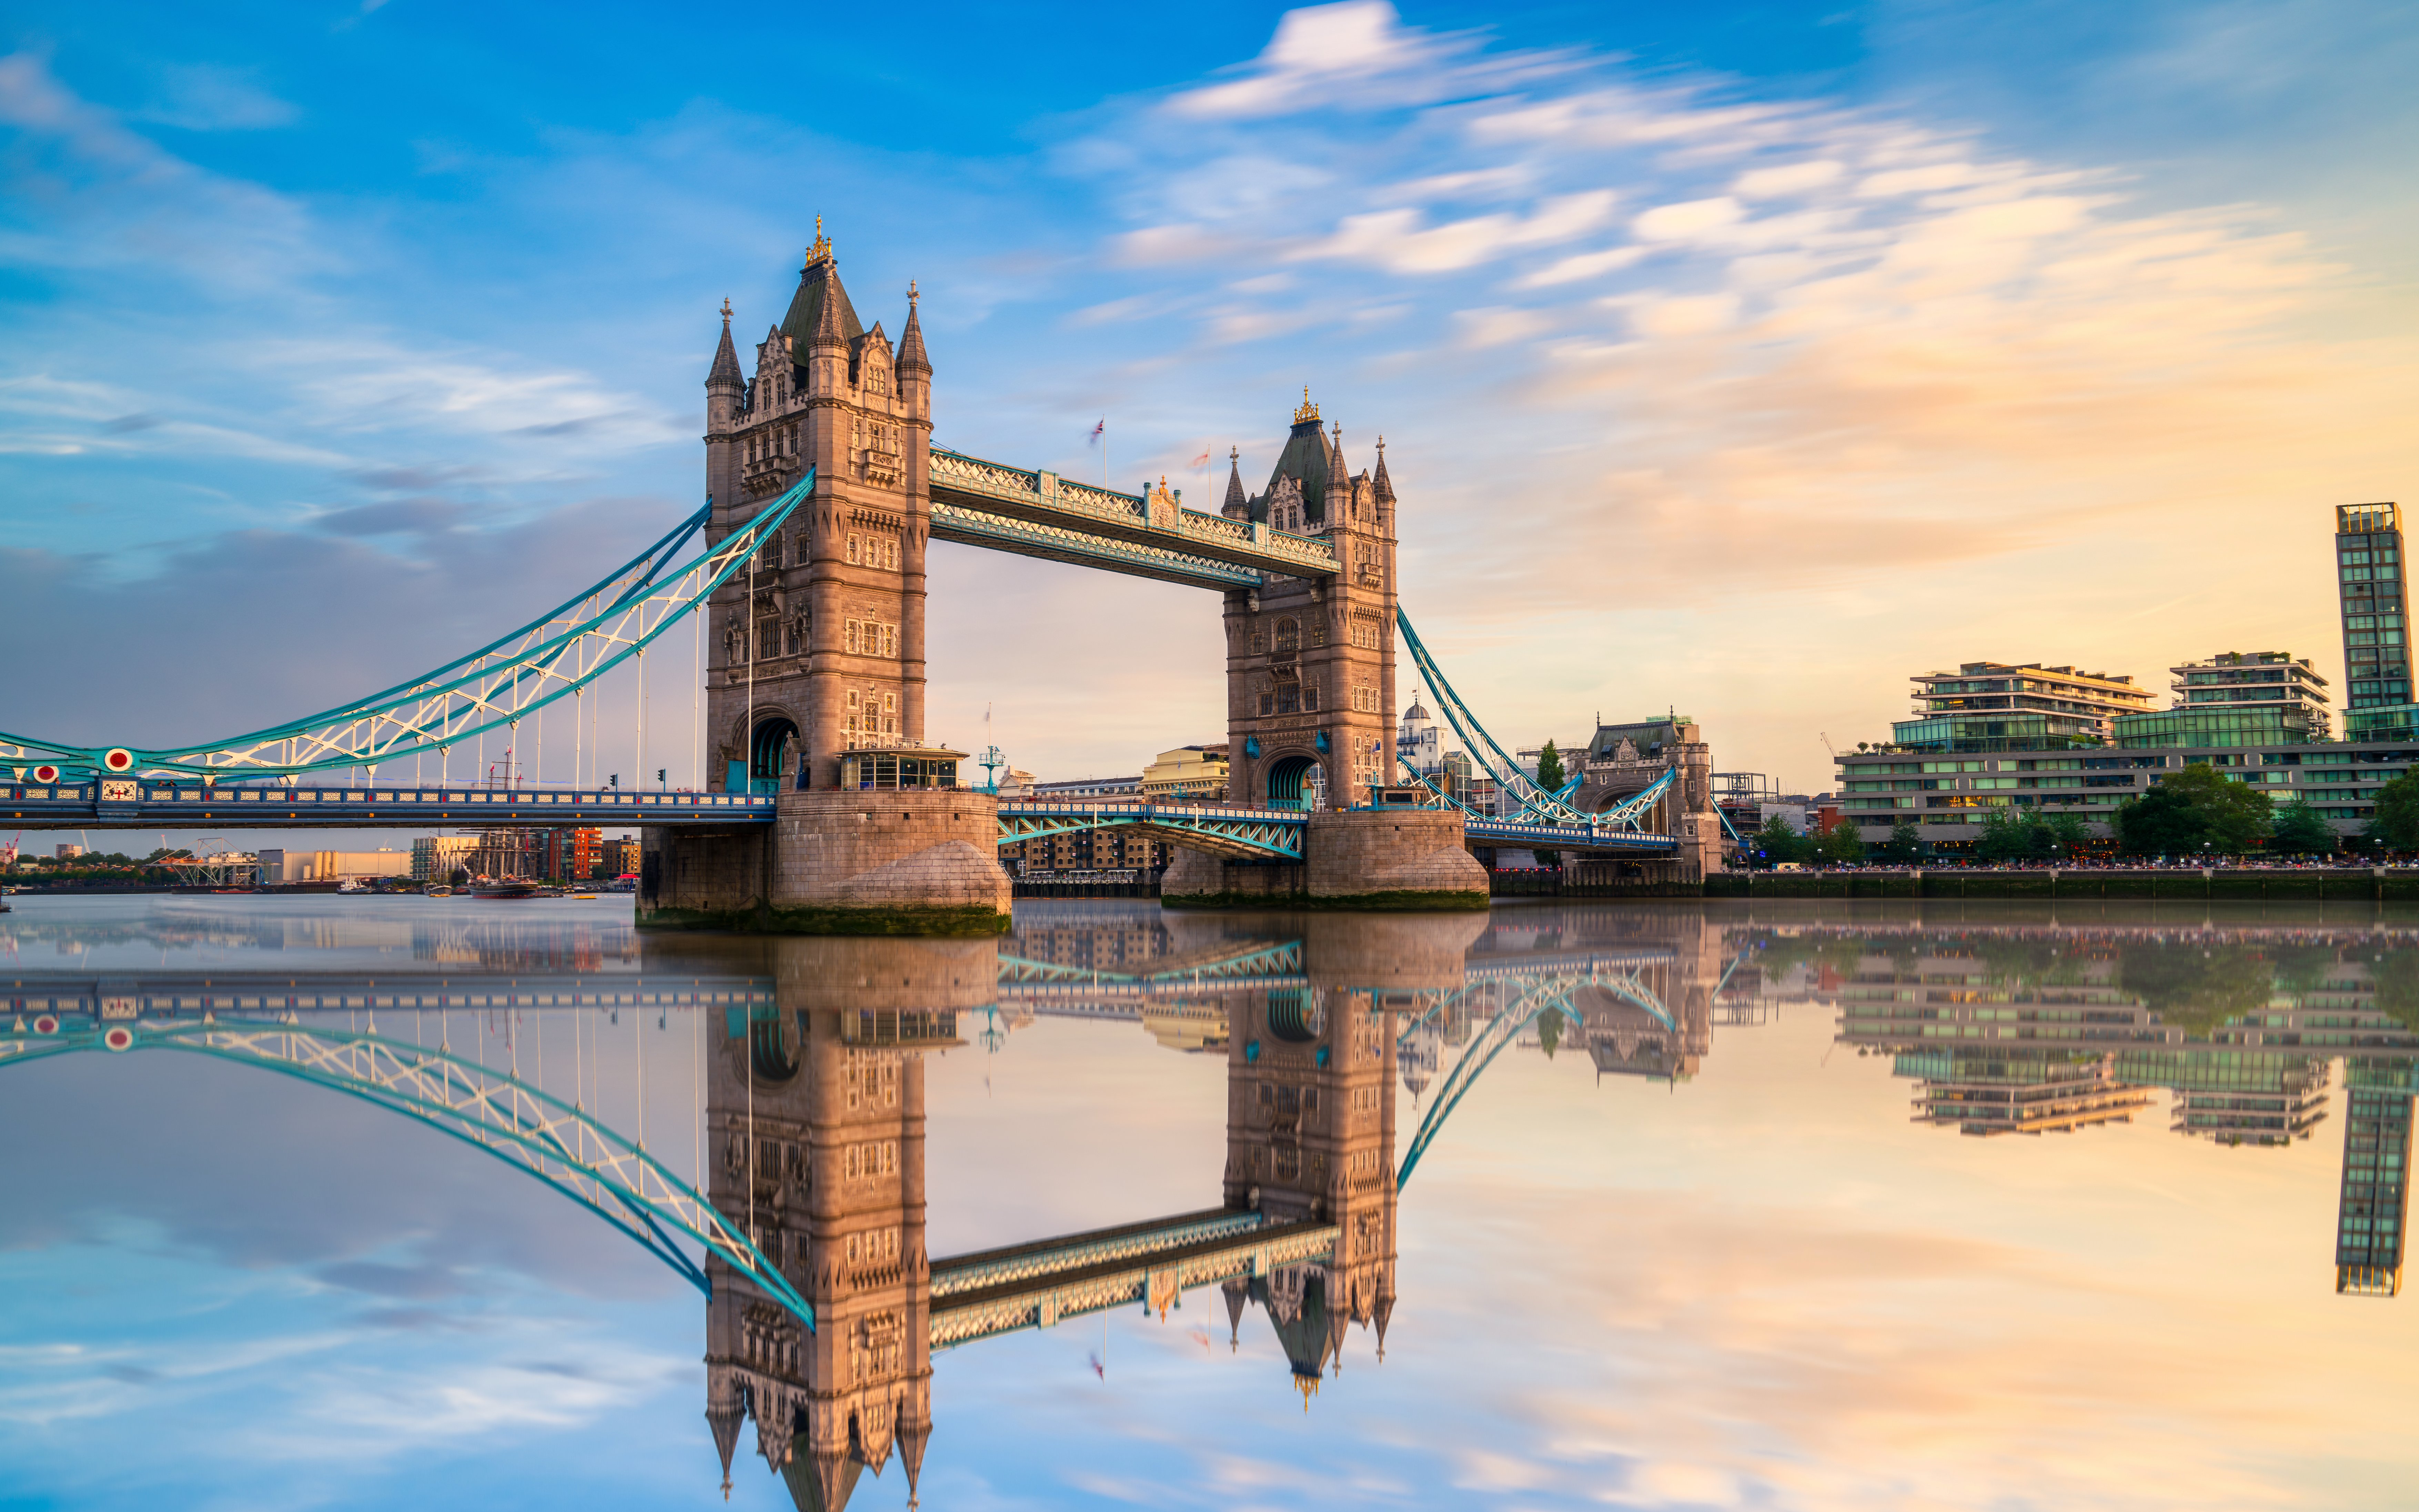
Step into Wakefield Tower’s river-facing windows for clean Tower Bridge photos. The spot stays calmer than the Wharf railings.
Hit the Crown Jewels first
Go straight to the Jewel House. By 11:00 the line often spills into the yard and adds 30+ minutes.
Find Traitors’ Gate waterside
Walk the river edge and stop at Traitors’ Gate below St Thomas’s Tower. Most people miss it while beelining inside.
Do the walls counter-clockwise
Start near the Middle Tower and loop counter-clockwise to the White Tower. You dodge the heaviest jams on narrow wallwalks.
Skip the Raven shop stop
The Raven Shop sits by the exit and repeats souvenirs from the main shop. Save it for the last 5 minutes.
Use the Wakefield Tower view
Step into Wakefield Tower’s river-facing windows for clean Tower Bridge photos. The spot stays calmer than the Wharf railings.
Pick your Tower of London route
Short on time, here for the Crown Jewels, or ready to explore the full fortress? Start here.
The essentials in 90 minutes
Best for first visitsHit the Crown Jewels, a key tower, and the best medieval rooms fast.
Middle Drawbridge & Byward Tower
10-15 minsCrown Jewels (Jewel House)
25-40 minsWhite Tower (Line of Kings & Royal Armouries)
30-45 minsSt John’s Chapel (inside the White Tower)
10-15 minsTower Green
10-15 minsMiddle Drawbridge & Byward Tower
10-15 minsCrown Jewels (Jewel House)
25-40 minsWhite Tower (Line of Kings & Royal Armouries)
30-45 minsSt John’s Chapel (inside the White Tower)
10-15 minsTower Green
10-15 minsPrison stories and executions circuit
Best for dark history fansFollow the prisoners’ route from gateways to cells to the execution ground.
Traitors’ Gate
10-15 minsBloody Tower
20-30 minsWakefield Tower
15-25 minsBeauchamp Tower
25-35 minsTower Green
15-20 minsChapel Royal of St Peter ad Vincula
15-25 minsTraitors’ Gate
10-15 minsBloody Tower
20-30 minsWakefield Tower
15-25 minsBeauchamp Tower
25-35 minsTower Green
15-20 minsChapel Royal of St Peter ad Vincula
15-25 minsThe full Tower of London circuit
Best for the whole storyCover jewels, towers, battlements, ravens, and the full inner-ward loop.
Middle Drawbridge & Byward Tower
10-15 minsCrown Jewels (Jewel House)
30-45 minsWhite Tower (Line of Kings & Royal Armouries)
45-70 minsSt John’s Chapel (inside the White Tower)
10-15 minsBattlements walk (Inner Ward walls)
25-40 minsRaven enclosure (by the Wakefield Tower)
10-15 minsBloody Tower
20-30 minsTower Green & Chapel Royal of St Peter ad Vincula
30-45 minsMiddle Drawbridge & Byward Tower
10-15 minsCrown Jewels (Jewel House)
30-45 minsWhite Tower (Line of Kings & Royal Armouries)
45-70 minsSt John’s Chapel (inside the White Tower)
10-15 minsBattlements walk (Inner Ward walls)
25-40 minsRaven enclosure (by the Wakefield Tower)
10-15 minsBloody Tower
20-30 minsTower Green & Chapel Royal of St Peter ad Vincula
30-45 minsHidden details most people walk past
Five easy-to-miss specifics inside the Tower of London, each with an exact spot to find it.
Spot these as you follow the one-way route through the buildings.
Norman chapel inside the White Tower
White Tower, 2nd floor, St John’s Chapel
Look for: Stand under the barrel vault and find the plain round arches on thick columns, with almost no carving.
Why it matters: St John’s Chapel dates to around 1080 and shows the stripped-back Norman style William the Conqueror’s builders used.
Medieval graffiti in the Beauchamp Tower
Inner Ward, Beauchamp Tower, first-floor prison rooms
Look for: Look along the stone walls for carved names and symbols, including “ROBERT DUDLEY” cut in large letters.
Why it matters: The Beauchamp Tower graffiti records Tudor-state prisoners held here, including Robert Dudley in 1553.
Roman fort wall by Tower Hill
Outer curtain near the north-west corner, by Tower Hill and the ticketed walkway
Look for: Find the rough, low masonry band with courses of small squared stones and red tile fragments set into the wall.
Why it matters: This is a surviving stretch of the Roman Londinium riverside fortification, built in the 2nd–3rd centuries.
Execution memorial at Tower Green
Inner Ward, Tower Green, grass plot beside the Chapel Royal of St Peter ad Vincula
Look for: Stand by the circular glass pillow set into the grass and read the etched names around its rim.
Why it matters: The memorial marks the private scaffold site where Anne Boleyn was executed on 19 May 1536.
Ravens and their name plaques
Inner Ward, around the Wakefield Tower lawn and the Raven Shop area
Look for: Check the small plaques and tags for raven names like Jubilee, Harris, and Poppy as they hop near the lawn ropes.
Why it matters: The ravens are cared for by the Tower’s Ravenmaster, a Yeoman Warder role that keeps a long-running Tower tradition alive.
What deserves your time
Not every stop offers the same payoff. Here’s what to prioritise, what can quietly eat into your visit, and what’s worth saving for later.
Do not miss
Yeoman Warder tour from the Middle Tower
Join the Beefeater tour at the Middle Tower; the 45-minute route ties Traitors’ Gate, Tower Green, and executions into one clear story.
White Tower route: Line of Kings to St John’s Chapel
Enter the White Tower for the Line of Kings, then climb to St John’s Chapel; the armour galleries repay every steep stair.
Time traps
Jewel House queue after late morning
After 11:30 the Jewel House line bunches at the entrance by the moat, stretching a 10-minute viewing into 40 minutes.
Raven viewing near Wakefield Tower railings
The raven pens beside Wakefield Tower bottleneck for photos, and the same birds are visible again along the inner ward path.
Worth it if you have time
Medieval Palace in St Thomas’s Tower
Step into St Thomas’s Tower to see the Medieval Palace rooms; the recreated bedchamber makes sense after the Yeoman Warder story.
Fusilier Museum in the North Bastion
Use the Fusilier Museum in the North Bastion for a quiet 15-minute loop; it fills gaps while crowds peak at the Jewel House.
Making your Tower visit easier
Cut steep steps and long standing by choosing the right areas first.
Accessibility & easier access
Use flatter routes and timed stops to reduce stairs and long standing.
- Enter via the venue’s accessibility entrance where available; ask staff on arrival to confirm the easiest route.
- Prioritise the Crown Jewels early, then keep the rest flexible to avoid committing to long walks.
- Skip prolonged tower climbs if stairs are tough; focus on ground-level walls and courtyards instead.
With young kids
Keep it simple: one headline stop, one short loop, then snacks.
- Bring a stroller only for longer naps; the cobbles inside the walls push easier with larger wheels.
- Pick one “big” anchor like the Crown Jewels, then limit the rest to a 60–90 minute loop.
- Use the open spaces on Tower Green for resets; tight interior rooms bottleneck fast with kids.
Where to get the best shots
Five angles beat the crowds with clean frames of the Tower, bridge, and walls.
 ICONIC VIEW
Traitor's Gate waterline
Shoot through the arch at 09:00 for reflections and empty foreground on the moat.
 RIVER BACKDROP
Wharf by Middle Tower
Frame Tower Bridge behind the battlements at 07:30 for river light and fewer tourists.
 DRAMATIC SHOT
White Tower south lawn
Use a low angle at 10:00 to stack turf, stone, and turrets with the flag in frame.
 GOLDEN HOUR
St Thomas's Tower walkway
Catch 17:30 sun on crenellations, with the Thames glinting through arrow slits.
 HIDDEN ANGLE
Salt Tower spiral stairs
Shoot upward at 09:30 for a tight stone helix; no tripods, no flash, no drones.
After the Tower walls
One default next move, plus three alternatives depending on what you need: food, quiet, or one final view.

Tower Bridge + river walk
Best for: the classic post-Tower move
If you want the classic post-Tower move, this is it. Step out of fortress stone into open river light, cross Tower Bridge, and let London suddenly feel bigger, calmer, and properly photogenic.
The paid walkway is optional. The outside crossing is enough for most visitors.
St Katharine Docks
Best for: a proper sit-down lunch
When the Tower has drained you, this is the easiest nearby reset: quieter than Tower Hill, waterside, and built for an actual lunch rather than a quick coffee.

St Dunstan in the East
Best for: escaping the crowds
A bomb-damaged church turned hidden garden, with ivy, stone arches, and real silence when you do not want another attraction stacked on top of the Tower.
Sky Garden
Best for: one memorable ending
If you want to finish big, this gives you sweeping views over the Tower, Thames, and City skyline from above, with no ticket cost if you can grab a free timed slot.
